
Chapter 6: Roofs
IN THIS LESSON
General Rules
¼” gap at bottom from drip cap
⅛”-¼” gap between shingles
Double course on first row
Fasteners
2 per shingle
¾”-1”from each edge
Shingles over 8” (2 additional nails)
Nail placement, 1 ½” above reveal line
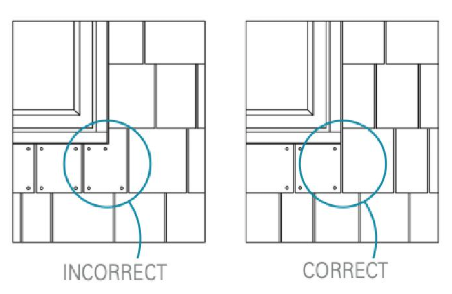
Joint staggering must be ≧ 1 ½”
2”” spacing above roof flashing
¼” spacing above head casings
First row
½” Spacing on first course base row
finished spacing on first course final row
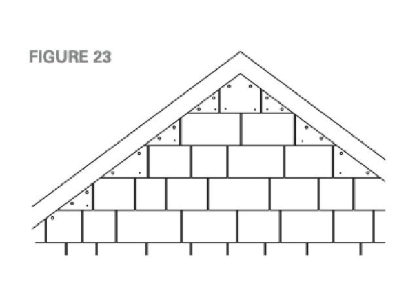
4” minimum exposure at all times (gable and top of walls)
Glue and fasteners used on gable shingles

Process, step-by-step
Space starter course ½” off of sill/drip edge
Space first row, final course ¼”
Run second course level
Use a hanging rack to set course level
Split the difference on the 7” reveal around the house
Story pole layout
Check coursing in relation to bottom and top of all penetrations
Adjust layout and get approval
Third course (and all remaining) should be set with gecko clips
Cut with utility knife
Cut with the grain
Trim with block place
Touch up paint on trimmed edges
Don't notch shingles at bottom of windows
Align joint with corner of casing
Tools
Torpedo level
Knives
Block plane
Jig saw/hand saw
Marking gauge
Caulk gun
-
Add a short summary or a list of helpful resources here.